Now that we are back into the school runs, we have to remember how to get ourselves presentable in the five minutes we have left after making the lunches, ironing the school uniforms (not me, but I understand some awesome mums do this), wrangling children, taming pig tails and brushing teeth etc. I have previously written
Tip and Tricks for trying to look presentable for the school run. But, this time I have called in the big guns to give us some tips for doing our hair quickly. Toni Hilton from
Beautiful You in Margate was kind enough to let me pick her brain.
Important tools that everyone should have:
- Tail comb
- bobby pins
- hair bands
- head bands
- hair straightener
- dressing brush
Great Products you could use:
- Beach spray
- Aerate product
- Root lifting products
- memory products
- Dry shampoo
- hair spray (not lacquer, you still want it to look like hair and not a helmet)
SHORT
The key to styling short hair is the cut and with no-fuss and minimal products. With the right hair cut you can wash and blow dry in minutes and walk away looking fabulous.
Look One
The messy volume look
Apply a volumising product, we used
Redken Aerate 08 bodyfing cream-mousse. Rub a small amount onto your hands and massage into roots then through to the ends. Use your blowdryer to dry the hair upwards, then forwards and around the sides, all the time using your fingers to lift the hair up from the roots. Depending on your part, over exaggerate the direction of the part so it sits a little flatter across the forehead. For even more volume throw your head over and blow dry hair up first. Use a little more of the original product as a finishing wax to move the hair into place. Remember don't spend too much time on your hair, the more your fiddle the more unhappy you are with it.
Look Two
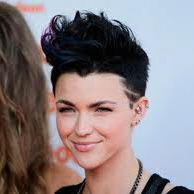
Up and at 'em hair inspired by Ruby Rose
This is my favourite, but I was unable to get any good photos of it. Very disappointing I know. If you don't know Ruby Rose, here is a photo of her. We didn't do her hair or take her photo or even meet her, but if she did come into the salon, this is what we would do to recreate this look.
Again use your fingers and mostly blow dry your hair upwards (throwing your hair over again works well) use a small brush or vent brush through the top to get extra lift. You can go a little crazy and tease the top a little. To finish it off you need a shiny light weight wax, we would use
Redken Structure wax. apply to finger tips and slide through the sides to flatten slightly, you can even tuck behind the ears if it's long enough then using your fingers lift the top middle and crown up.
Ruby would look like this when she looks in the mirror, amazed that it was so quick to achieve something that looks this awesome. No worries, Ruby.
MEDIUM
Most medium length hair seems to be in a bob style. weather blunt or choppy and layered this is such a versatile length.
Look One
Front side braid with a messy back bun
If you have a hair straightener and suffer from hairline fluffys, take 60 seconds to just smooth the front you will be glad when your braid is smoother. Then part the hair on the side and make a braid about 1-2 inches thick, depending in the thickness of your hairline, the finer the hair, the thicker the braid, once the braid has reached the ear, use a thin elastic band to hold into place. Through the back of your hair, add some seasalt spray, we use Redken Natures Rescue radiant sea salt spray, using your dryer and fingers spend 2 minutes scrunching and messing it up. Loosly grab the hair including the braid and use a thin hair tie and start to pony tail the hair, on the last loop only half pull the hair through. Lastly, pull at the pony tail to tighten and to mess it up a little. Use bobby pins to secure any bits that might need more controlling. Light spritz of hair spray and you are good to go.
Look Two
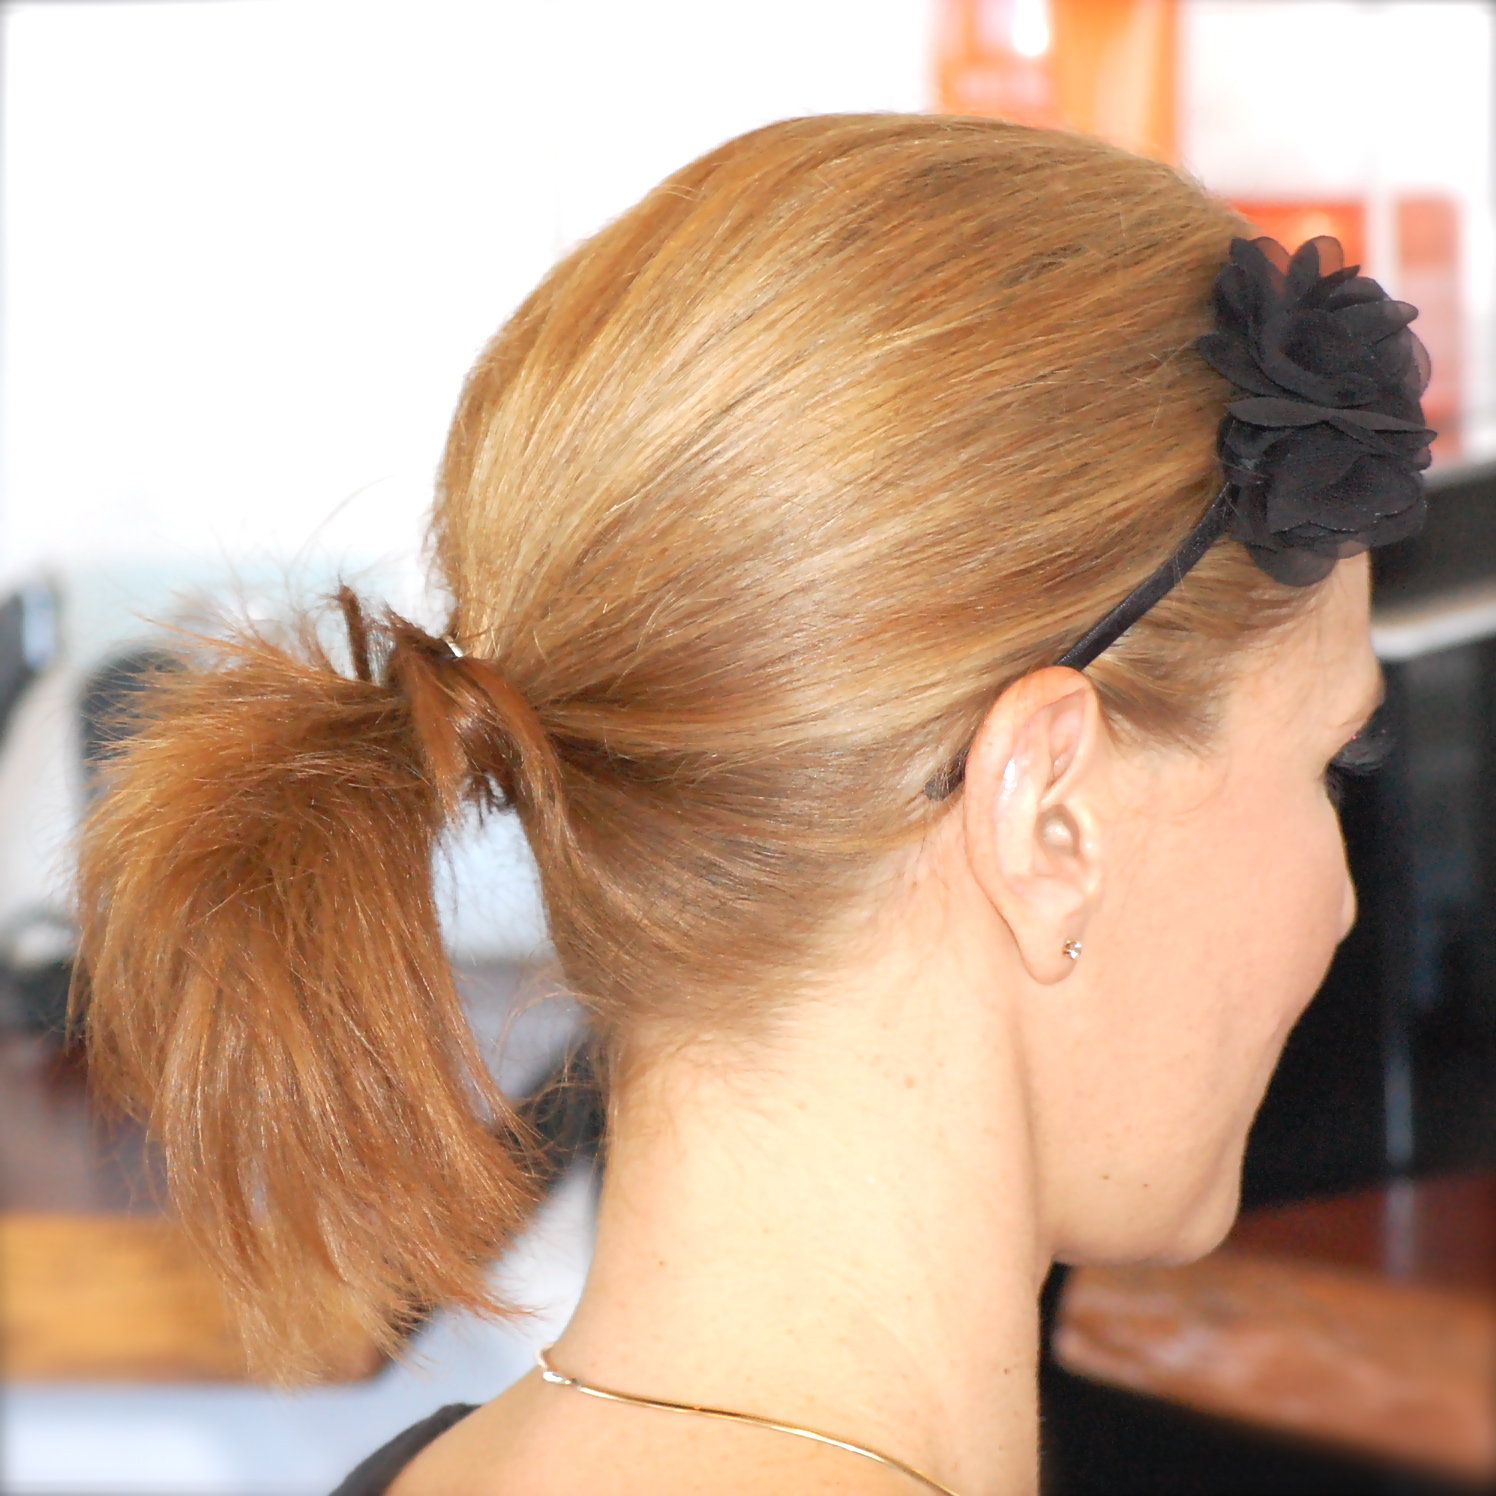
This one is so easy....again you can you a straightener to smooth the front section. Take sections from the top and tease the roots until you get to the the crown, gently smooth over with a dressing brush, grab your favourite headband and put on while pushing the front of your hair flat, you should now have a little beehive. Using your dressing brush pull the hair into a pony tail but careful not to flatten the hair behind the headband. Grab a small piece of hair from the underside of the pony tail, wrap it around the pony tail, hiding the hairband and secure underneath using a bobby pin.
You can make the beehive higher than this photo or do a bun instead of a pony tail.
LONG HAIR
Look One
Gorgeous beachy waves
Another easy one...you can either sleep in the plaits or use a hair straightener. If you are sleeping in the plaits, dampen the hair with salt spray before plaiting. Instead of sleeping in the plaits we used
Redken Spray starch memory spray all over the hair and divide the hair into 8 sections, if your hair is thicker you will need more sections. Loosely plait each section. You then use your hair straightener to pinch the plaits. The heat combined with the memory spray with help to keep the waves. When you have completed pinching all the plaits, let them cool down, then remove the hair ties. Loosely shake out the plaits and be careful not to handle the hair too much. You can leave like this or add a headband or clip.
Look Two
Messy side bun
We did this after creating the first look. You can do this with or without the waves. Both are easy and look great.
First create a side part, and then grab all the hair for a low messy bun on the opposite side to the part. The trick is not to try too hard to make it perfect or handle it too much. Twist the hair around itself until it looks like a bun then wrap your hair band around it. Using bobby pins, secure any bits that are too loose or falling out. A little falling out looks nice. Follow with a light spritzing of hair spray.
These hair styles really only took minutes to achieve. I have been trying them out this week. Thank you Toni for your time and suggestions.

PS: My husband was looking over my shoulder and is begging me to get the Ruby Rose cut and colour. I love it, I wonder if I'll be brave enough.